IMEI Number is the unique identification number required to register the device with the service provider to activate SMS, Calls, Data, and other services. Without IMEI or with Corrupted IMEI, you cannot register with the service provider and avail the services provided by them. If the IMEI number on your Qualcomm Snapdragon processor powered Android phone or tablet is corrupted, then don't worry as in this tutorial, we are going to show how to repair IMEI on Snapdragon devices.

Please note that this tutorial is only for Qualcomm Snapdragon processor powered Android smartphones. If MediaTek processor powers your device, then download IMEI Repair APK and follow the instructions provided here.
The Qualcomm IMEI repair process shared on this page works on most of the Qualcomm devices from Xiaomi, ZTE, Vivo, OnePlus, Oppo, Lenovo, and others.
Without any further ado, let's proceed to instructions on how to restore IMEI on Qualcomm Snapdragon Android phones and tablets.
How to Repair IMEI on Qualcomm Snapdragon Devices
To proceed to repair IMEI on Snapdragon processor powered devices, you must follow the steps listed below to prepare your device for the Qualcomm IMEI repair process.
Preparations
- Enable USB Debugging on your device from Developer Options. If Developer Options are missing from your Android phone settings, then go to Settings > About Phone and tap on Build Number for 7-10 times.
- Some devices need an unlocked bootloader. If it is not unlocked, then unlock the bootloader on your device from here.
- Need proper Root permissions. If not rooted, follow here.
- Install suitable Android USB Drivers on PC.
- Install and setup ADB and Fastboot Drivers on PC.
Disclaimer
This tutorial is only for educational purposes, and we are not responsible for any illegal use of the instructions listed below. This tutorial is meant for restoring IMEI on Qualcomm devices, but not for changing IMEI on Qualcomm devices.
Download Qualcomm Snapdragon IMEI Repair Tool
Write Dual IMEI Tool is a Qualcomm Snapdragon IMEI repair tool. With this tool, a user can write IMEI to a Qualcomm device and restore NULL IMEI or fix corrupted IMEI on Qualcomm Snapdragon devices.
Below you can download Qualcomm IMEI Writer Tool / Qualcomm IMEI Changer Tool for Windows PC.
File Name: WriteDualIMEI-W-G-eMMC.zip
Size: 35 KB
File Type: Zip/application
Steps to Repair IMEI of Snapdragon Device
- Note down the IMEI number of your device from the Box in which it came or by removing the back cover.
- Download and extract WriteDualIMEI_W_G_eMMC.zip package on your PC.
- Connect your device to PC using OEM USB Cable.
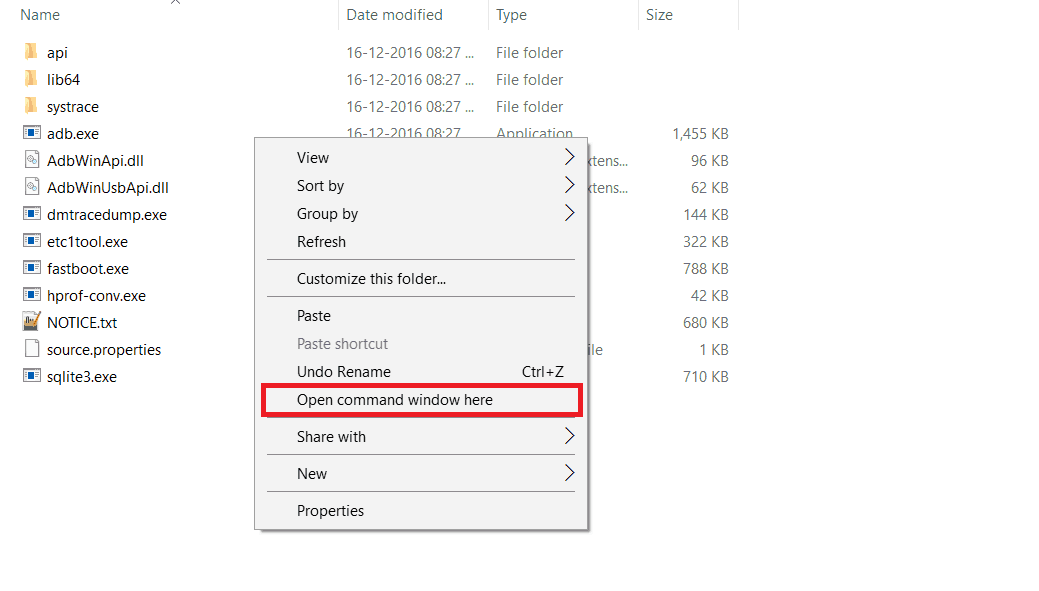
- Open the Fastboot folder and press and hold the Shift key and right-click inside the folder at the empty space. Now choose the Open command window here option.

- Now in CMD type the below commands one after another:
adb shell
su
setprop sys.usb.config diag,adb
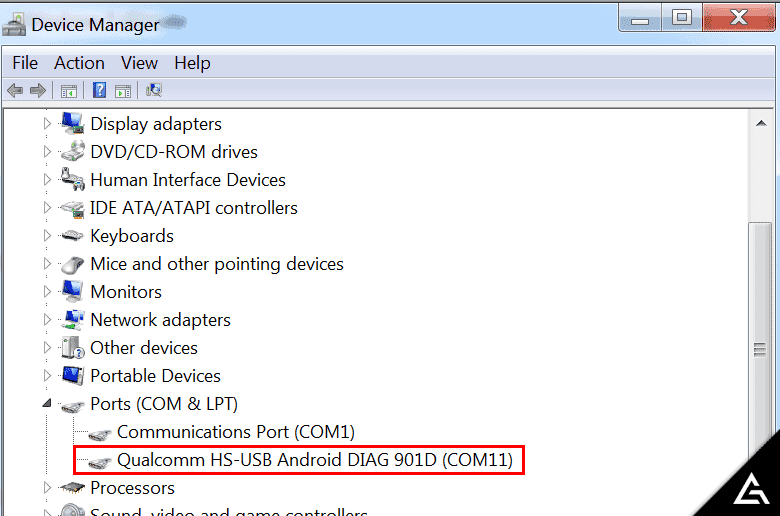
It will open DIAG COM Port or enable DIAG Port.
- Open the Device Manager and look for your device under Ports (COM & LPT). If it is not detected as Android DIAG, then right-click and select Update Driver Software… -> Browse my computer for driver software -> Let me pick from a list of device drivers on my computer and install Qualcomm COM Port Driver manually.

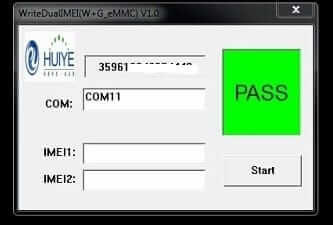
- Run WriteDualIMEI(W+G_eMMC).exe (Qualcomm IMEI Changer) as administrator.
- Enter the IMEI number and select COM Port and then hit Start.
- You should see the PASS message after a second or two.

- Now, Reboot your device and check the IMEI by dialing *#06#.
With this, we are done repairing IMEI on Snapdragon powered devices.
Have any questions? Ask them in the comment section below.
This page may contain affiliate links so we earn a commission. Please read our affiliate disclosure for more info.
my oneplus A5000 lost imei ,try your method but cannot find DIAG COM Port.please help me.
thanks
Hello Kyaw,
Follow the below steps to enable Diag Mode or Diag Port:
1) Download Terminal app on your Phone from here.
2) Enter the below commands:
adb shellsuIf asked to allow Root Permissions, kindly allow them.
setprop sys.usb.config diag,adb3) Connect your device to PC.
Also, check out this tutorial: https://www.gizmoadvices.com/activate-diag-mode-android/
Hi there, i wanted to try your instructions. But when i try typing “su” command in cmd, i got “permission denied” error. But i check my root via rootchecker. it says i have root access.
And one more question. To change imei number, should i backup EFS file?
Can you help me?
Try installing Terminal Emulator app on your Phone and enter the below commands.
susetprop sys.usb.config diag,adbIt is recommended to backup EFS file as it will help in restoring IMEI incase of corruption (Null IMEI).
Can i do this to
unrooted Snapdragon 835
Samsung?
The device must be rooted.
does this could work on mi8
It works with most of the Qualcomm Snapdragon powered smartphones.
What about a Galaxy Note 9. Do you know if this process will work for this device? Response will be greatly appreciated. Thanks
If it is a Snapdragon powered device then this tool might work.
Hello, followed all the instructions, but the WriteDualIMEI app is not recognizing the com port. any ideas?
Make sure you have USB Drivers installed and have opened DIAG port.
I did everything what I had to do on my cellphone and everything was okay, until I had to use the program WriteDualIMEI(W+G_eMMC).exe , this part is not understandable.
In the COM white space, what should I type on it?
COM Port is detected automatically. If it doesn’t get detected, make sure you’ve installed the drivers properly on your PC.
It’s not working for poco f1 .
Kindly send any other liñk
selam program redmı k 20 pro uzerınde calısırmı yardımcı olumusunuz tesekkur ederım
Google Translate: hi program redmı k 20 pro on the help you work thank you