Looking to Root BlueStacks 3 or BlueStacks 2? Then we have a complete step by step guide to help you get Bluestacks rooted easily. This tutorial is suitable for all the versions of Bluestacks including Bluestacks 2018 and Bluestacks 2017.
Bluestacks is one of the most popular Android emulators which lets you enjoy Games on your Windows or Mac computer. You can play your favorite Android games on your Desktop or Laptop thus giving you bigger screen experience.
Bluestacks supports most of the Android applications and it comes with its own Apps section from where you can download thousands of games. Alternatively, we have Google Play Store installed on BlueStacks App Player which gives access to Millions of apps.
Why should we Root BlueStacks?
There are many benefits of Rooting Blue Stacks and some of them are listed below.
- We can use apps which require Root Permissions.
- Allows modifying the Game Score by editing its configuration file.
- Allows modifying some of the features of the game.
- Allows customizing Android OS installed on BlueStacks.
In Order to Root BlueStacks 2018, we need to have it installed on our Computer.
Download BlueStacks 3 for PC/ Mac:
- Go to Bluestacks.com
- Click on "Download BlueStacks" on Homepage.
- You will be taken to the download page.
- Click on "Download" button to begin downloading the installation file.
- Once downloaded, install it on your PC/ Mac.
Let’s now proceed to Root BlueStacks 3 and BlueStacks 2.
We are going to share three methods in this tutorial which will help you in getting BlueStacks 3/ Bluestacks 2 Rooted.
Method 1: How to Root BlueStacks 3 with KingRoot App (One-Click Root bluestacks)
This method involves the use of KingRoot Application, a most popular one click root application.
Step 1: Run BlueStacks App Player on your PC/ Mac.
Step 2: Download KingRoot Apk on your computer.
Step 3: Click on "Install APK" on BlueStacks from Home screen.
Step 4: Browse and select the KingRoot Application to install it on BlueStacks.
Step 5: Once installed, run KingRoot App and click on "Begin" to start the Root process.
Step 6: Once done, you will see a green checkmark.
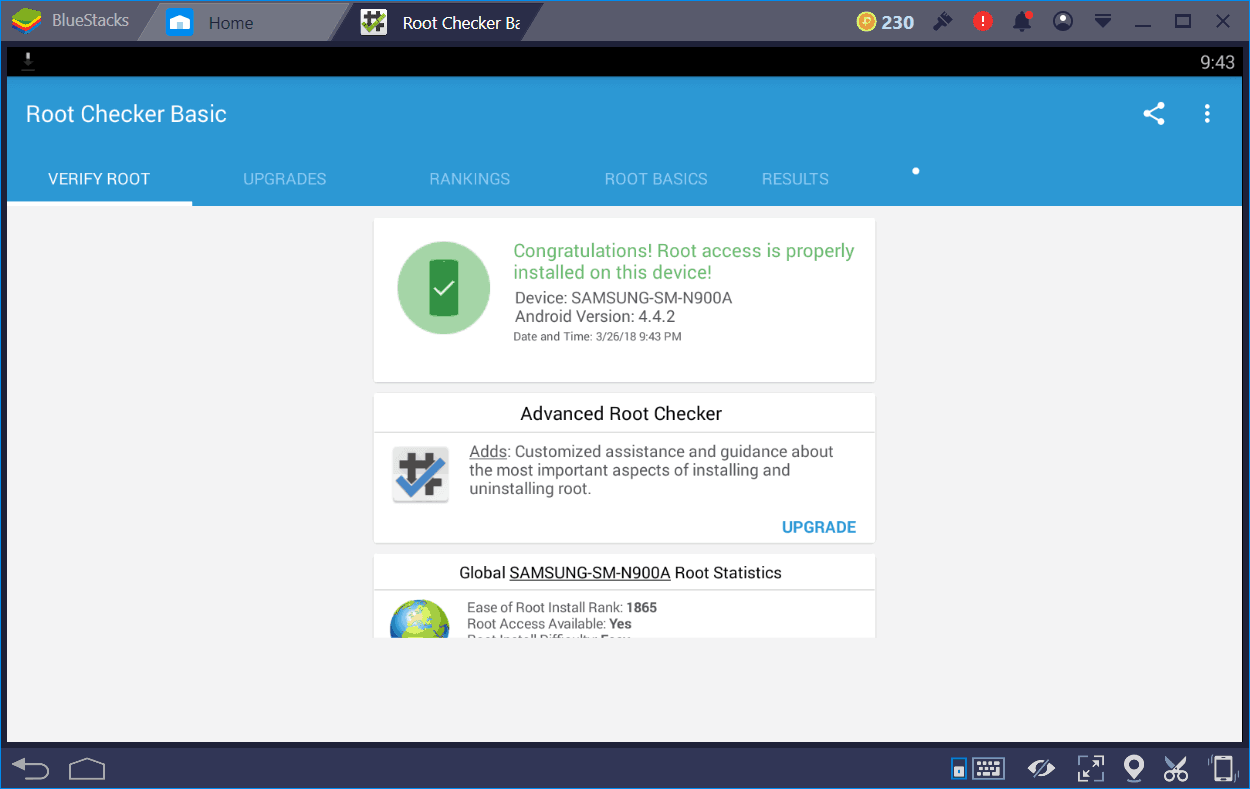
Step 7: Install Root Checker App from Play Store and verify Root permissions.
Method 2: How to Root BlueStacks 2018 or BlueStacks 2017 using BS Tweaker (BlueStacks Tweaker)
BlueStacks Tweaker is an application which allows performing many modifications to the existing Bluestacks installation. We can Root BlueStacks, make it premium, remove promos, Disable Google Sign in, Remove Preinstalled shortcuts, disable window of purchase and many more. Let’s see how we can use BS Tweaker to Root BlueStacks 2/ Bluestacks 3.
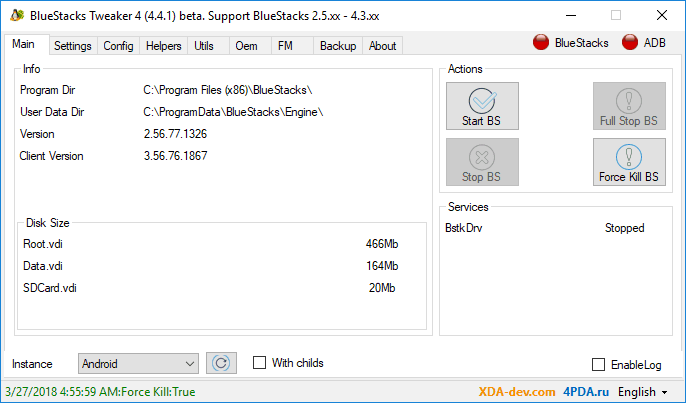
Step 1: Download BS Tweaker [source] zip package on your PC.
Step 2: Extract it and run BS Tweaker.exe file as administrator.
Step 3: Under the "Main" tab, click on "Force Kill BS".
Step 4: Once the BlueStacks and ADB indicators turn Red, go to "Helpers" tab.
Step 5: Click on "Unblock (multi)" near Root for BlueStacks.
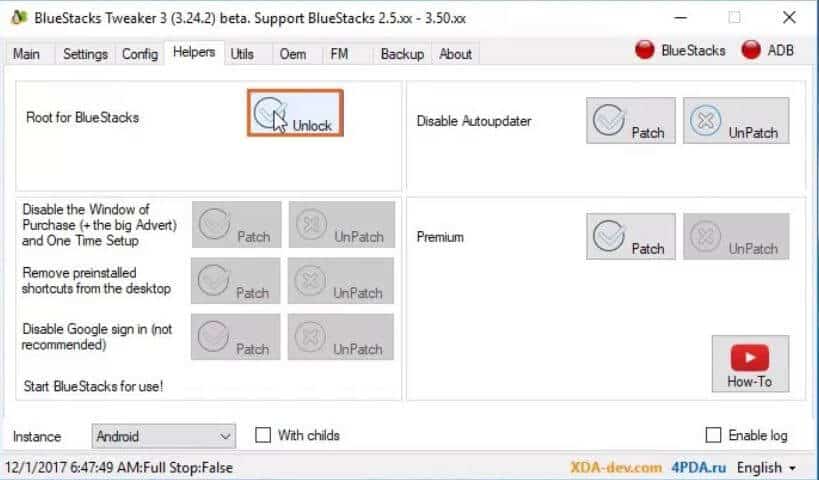
Step 6: Go back to the "Main" tab and click on "Start BS".
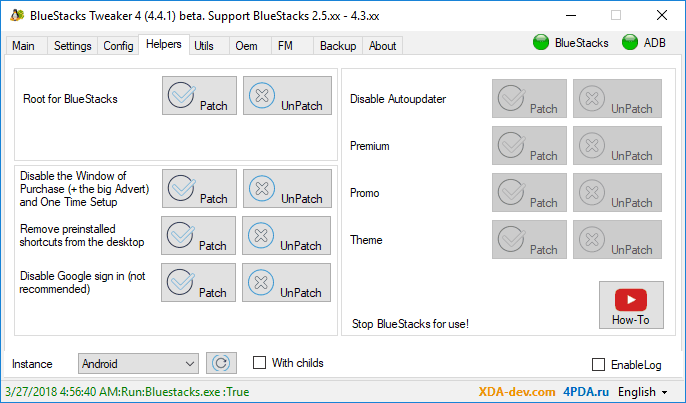
Step 7: Once the BlueStacks is started, go to "Helpers" tab and click on "Patch".
Step 8: Download Root Checker App from Play Store and verify the Root Permissions.
Step 9: In BlueStacks click on "Install APK" and browse to "BS Tweaker folder -> Utils" and select SuperSU.apk.
Step 10: Open SuperSU once it is installed and update the "su binaries".
Method 3: How to Root BlueStacks 3 2018 using BS Helper Tool:
BS Helper (BlueStacks Helper) Tool is another application which helps in Rooting BlueStacks easily without any hassle. In this method, we are going to use this tool to Root BlueStacks 2017 and BlueStacks 2018.
Step 1: Download BS Helper Tool from here and extract it on your computer.
Step 2: Run the BS Helper.exe file as administrator.
Step 3: A window should open with a lot of options.
Step 4: Click on "Patch for Superuser X" and wait for the process to complete.
Step 5: When done, a success message is shown and an app called Superuser x will open in BlueStacks.
Step 6: Install Root Checker and check Root Status.
Step 7: Done! You have successfully rooted Bluestacks 3 App Player for Android on Windows.
Did any of the above methods help you in achieving Root Access on BlueStacks 2018? Then don’t forget to share it with your friends on Facebook, Twitter and Google Plus etc.
If you have any queries then don’t forget to leave them in the comment section below.
This page may contain affiliate links so we earn a commission. Please read our affiliate disclosure for more info.
Hi,
Wow great article thanks for sharing
Really and I have not realized earlier.