• Skip to primary navigation
  • Skip to main content
  • Skip to primary sidebar
Gizmo Advices

Gizmo Advices

Gizmo Advices is a tech blog on Google Android OS, Apple iOS, Windows Phone etc. It provides latest news and How to Tutorials & Guides.

  • Downloads
    • Android USB Drivers
    • Apps
    • Gapps
    • Wallpapers
  • How to
    • Bootloader
    • Custom Recovery
    • Custom ROM
    • Root
    • Stock Firmware
    • Screenshot
    • iOS
    • Tips and Tricks
  • Best List
  • Best Deals
  • Reviews
  • Contact Us
How to

How to create Nandroid Backup in Android using CWM / TWRP Recovery [Guide]

Last Updated: April 9, 2019 by Alpesh

This tutorial shows how to create a Nandroid Backup of your Android device using CWM / TWRP Recovery.

Flashing Custom ROMs and Custom Kernels can add more features to your device and also improves the performance and battery life of your device. But installing or flashing them is a huge risk as there are many ROMs and Kernels available which are corrupted and installing them can brick your device. So to reduce the risk of bricking your device we have come with a tutorial on how to create a Nandroid Backup of your Android device.

Create Nandroid Backup in Android using CWM / TWRP Recovery

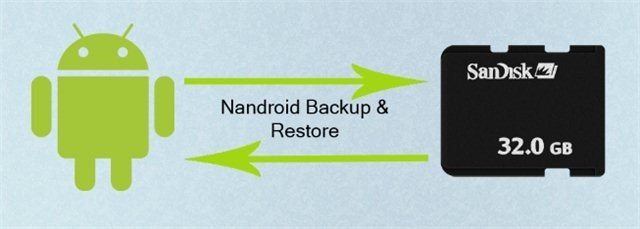
Nandroid backup is the backup of your current ROM, which includes all apps and system files etc. Nandroid Backup can be done using Custom Recoveries like CWM and TWRP. So you must have installed CWM / TWRP Recovery on your Android device before you proceed to steps on how to create a Nandroid backup.

Assuming that you have already installed CWM / TWRP Recovery on your device, let’s now proceed to steps on how to create a Nandroid Backup and Restore it using CWM / TWRP Recovery.

Create Nandroid Backup using CWM Recovery:

  • Power off your device and boot into Recovery Mode.
  • Now in CWM Recovery, select “Backup and Restore” and then “Backup”.
  • In some devices it will ask you to choose the location where you want to create backup, whether you want to create Backup on internal storage or on External SD Card.
  • Make sure you have sufficient charge on your device as the backup process may take some time.

How to Restore Nandroid Backup using CWM Recovery:

  • Power off your device and boot into Recovery Mode.
  • In CWM Recovery choose “Backup and Restore” and select “Restore”.
  • If the Nandroid Backup file is save to internal storage choose “/sdcard”, if it is on External SD card then choose “Restore from /storage/sdcard1”.
  • Choose the backup file.
  • Now the restore process begins and restores all of your data and settings and also the system files.

Create Nandroid Backup using TWRP Recovery:

  • Power off your device and boot into Recovery Mode.
  • In TWRP Recovery choose “Backup” and check all the partitions that you want to backup.
  • Now choose the location and Enable compression if you want and then swipe to begin backup process.

Restore Nandroid Backup using TWRP Recovery:

  • Power off your device and boot into Recovery Mode.
  • In TWRP Recovery choose Restore and select the backup file that you want to restore.
  • At last swipe to begin the restore process.
  • Now all data and system files are restored.

This is how we create a Nandroid Backup and Restore it using CWM or TWRP Recovery. Do share this tutorial with your friends on Facebook, Twitter and Google Plus etc. and let them know how to create a Nandroid Backup.

How to create Nandroid Backup in Android using CWM / TWRP Recovery [Guide] was last modified: April 9th, 2019 by Alpesh

This page may contain affiliate links so we earn a commission. Please read our affiliate disclosure for more info.

FacebookTwitterWhatsAppRedditPin It

👇👇Latest Video on YouTube 👇👇

RELATED POSTS

  • How to Install TWRP Recovery without PC using Flashify

    How to Install TWRP Recovery without PC using Flashify

  • How to Install TWRP Recovery and Root Honor 8

    How to Install TWRP Recovery and Root Honor 8

  • How to Install TWRP Recovery and Root Galaxy S7 and S7 Edge – Exynos Version

    How to Install TWRP Recovery and Root Galaxy S7 and S7 Edge – Exynos Version

Reader Interactions

JOIN THE DISCUSSION: Cancel reply

We never share our visitor/user details. For more info, Please read our privacy policy before submitting your comment.

Primary Sidebar

YOU MIGHT ALSO LIKE…

  • How to Fix Message+ Keeps Stopping? Solutions to Verizon Message+ Crashing How to Fix Message+ Keeps Stopping? Solutions to Verizon Message+…
  • What is ADB Sideload? How to Install OTA / Sideload ROMs and Mods on Android What is ADB Sideload? How to Install OTA / Sideload…
  • How To Transfer from iPhone to Android How To Transfer from iPhone to Android
  • How to Connect DZ09 to iPhone or Other iOS Devices How to Connect DZ09 to iPhone or Other iOS Devices
  • How to Flash Stock Firmware (ROM) on LG device with LGUP Tool How to Flash Stock Firmware (ROM) on LG device with…

Recent Posts

  • Best Triple SIM Android Smartphones Best Triple SIM Android Smartphones
  • List of DZ09 Smartwatch Phone Secret Codes List of DZ09 Smartwatch Phone Secret Codes
  • How to Change Clock Face on DZ09 Smartwatch How to Change Clock Face on DZ09 Smartwatch

Latest Video

Find us on Facebook

Gizmo Advices Facebook Page

AMAZON PRIME DAY DEALS!!!

Amazon Daily Deals Banner

This page may contain affiliate links so we earn a commission. Please read our affiliate disclosure for more info.

  • About Us
  • Contact Us
  • Affiliate Disclosure
  • Privacy Policy
  • Sitemap

Copyright © 2021 Gizmo Advices | All Rights Reserved

This site uses cookies to deliver services and provide best experience. By using our site, you acknowledge that you have read and understand our Privacy Policy and agree to the use of cookies.

X